The Sludgeon is a massive tower/dungeon structure that generates in Sludge Plains Clearing biomes.
The Sludgeon has a world location that identifies the area it takes up, as well as a title that appears briefly to players who approach it.
Most of the blocks of the Sludgeon are protected from destruction by a ward that persists until the Sludge Menace, the boss in the Pit of Decay, has been defeated.
Composition[]
The Sludgeon Tower:
 Mud Bricks(Undecayed)
- Worm Pillar(Undecayed)
- Pitstone Bricks
- Pitstone Tiles
- Pitstone Pillar
- Smooth Pitstone
- Rotten Bark
- Carved Rotten Bark
- Rotten Support Beam
- Rotten Planks
- Beam Lens
- Beam Passage
- Beam Origin
- Brazier
- Root
- Diagonal Energy Barrier
- Urn of Chance
The Labyrinthine Vaults:
- Mud Bricks(All Variants)
- Carved Mud Bricks(All Variants)
- Runged Mud Bricks
- Worm Pillar (All Variants)
- Mud Tiles
- Decayed Mud Tiles
- Broken Mud Tiles
- Mud Tiles Spike Trap
- Mud Brick Spike Trap
- Puffshroom
- Compacted Mud
- Compacted Mud Mirage
- Carved Rotten Bark
- Rotten Support Beam
- Dungeon Door
- Dungeon Door Code
- Glowing Betweenstone Tile
- Wall Candle
- Dungeon Alcove
- Urn of Chance
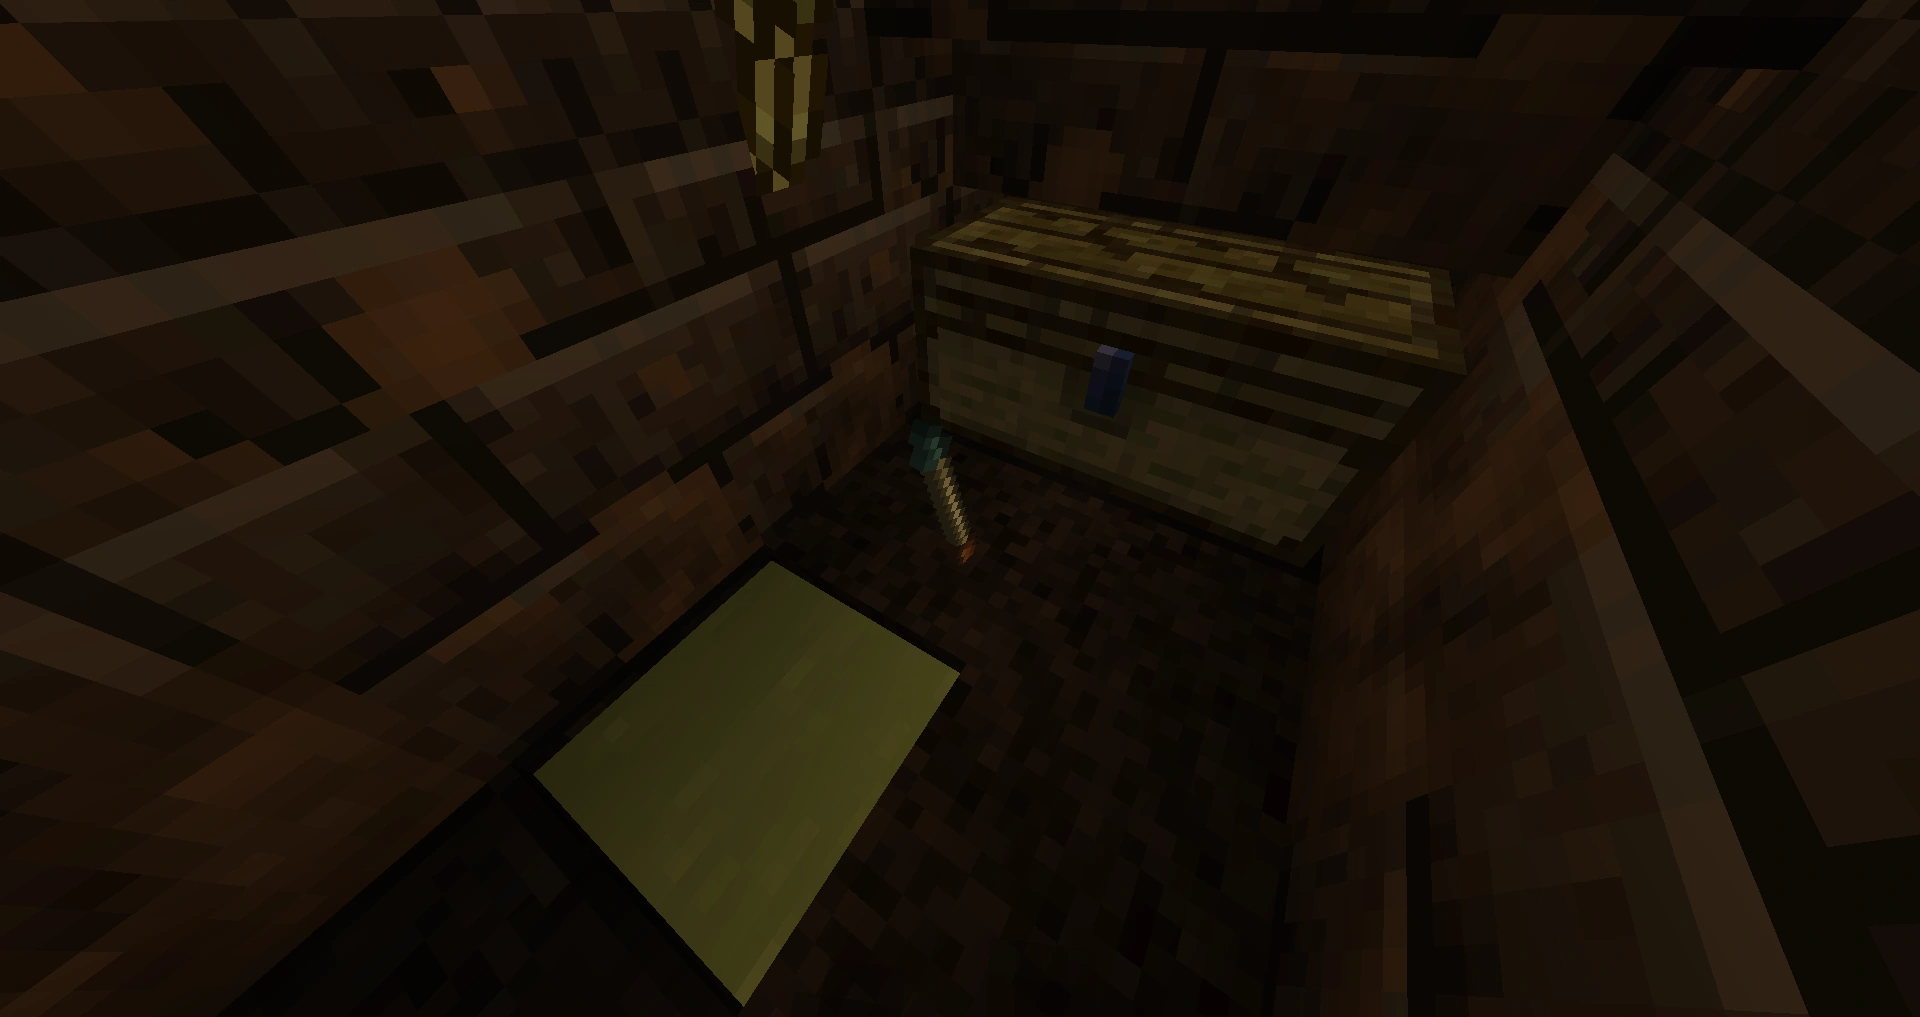
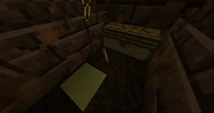
- Weedwood Chest
- Brazier
- Cryptweed
- Edge Leaf
- Edge Moss
- Edge Shrooms
- Pale Grass
- Rotbulb
- String Roots
- Tall Sludgecreep
Sludgeon Tower[]
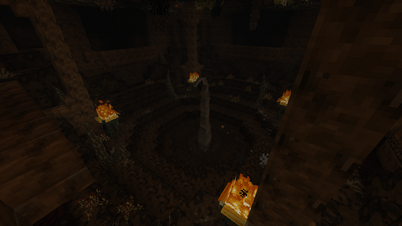
To enter the underground part, the player needs to complete a puzzle to open the door that leads to the main part of the dungeon. First the player needs to light the 4 braziers at the top of the tower, activating the Beam Origin, which will continuously shoot an energy beam at the Beam Lens below it. Beam Lenses can be reoriented in any of the six different directions by right-clicking them. The order in which they are reoriented when clicked is as follows: Down -> Up -> North -> South -> West -> East. The beam must be redirected through several Beam Lenses and Passages until it reaches the Dungeon Door at the base of the tower, where the door will then open and allow access to the Labyrinthine Vaults of the Sludgeon.
Lighting the Braziers[]
To light the Braziers at the top of the Sludgeon Tower, the player needs to start a fire the same way as they would anywhere else:
- Drop (Q) Moss, Cave Moss, Lichen, or Thorn items on top of the Brazier, then hold right click with an Octine Ingot.
- Using a Pyrad Flame to light them.
- Vanilla Fire Charges also work.
Four Emberling Shamans will also spawn - one on each brazier - when the Beam Origin activates.
Labyrinthine Vaults[]
The Labyrinthine Vaults consist of a giant maze with 7 layers under the Slugeon, each filled with unique mobs and traps. Loot is also scattered inside them, in the forms Urns of Chance, and more rarely Chests and Shelves.
In order to navigate through each layer, the player needs to open each Dungeon Door by inputting a code. These Dungeon Door Codes can be found near each staircase up to the previous layer. Once the player has seen the symbol, they need to recreate the symbol on the Dungeon Door by clicking on the middle part of the door until the code is the same. Due to the number of combinations, brute forcing would be quite difficult, so taking a screenshot is recommended to avoid backtracking.
The labyrinthine vaults are exactly 32 blocks by 32 blocks long, not counting the crypt crawler tunnels that surround them. A dungeon door to the next layer is always on the opposite corner of the staircase leading down from the previous floor.
First Layer[]
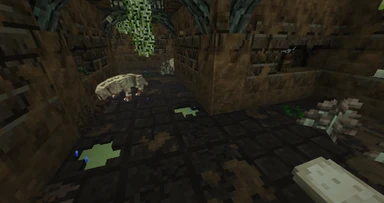
The first layer comes right after entering the Sludgeon by solving the Beam puzzle at the top. It's filled with Worm Holes that continuously spawn Tiny Sludge Worms, although these holes can be "killed" with normal attacks. Scattered throughout this layer, the player can find some Broken Mud Tiles that will turn into Stagnant Water when walked on, although this can be avoided by sneaking over them.
Second Layer[]
The second layer is a layer filled with Shamblers and more Worm Holes, as well as the aforementioned Broken Mud Tiles on the floor. Other than the different mobs, it is mostly the same as the first layer.
Third Layer[]
The third layer is filled with Lampreys, Sludge Worm Egg Sacs, Broken Mud Tiles, as well as Spike Traps on the floor and walls.
Fourth Layer[]
The fourth layer is filled with Sludge Jet Turrets and more Broken Mud Tiles on the floor.
Barrishee Lair[]
On the fourth layer, there is also a secret door leading to a special room, the Barrishee lair. When unlocking the false Dungeon Door, a Barrishee will spawn, blocking the way to its lair. Once killed, the area behind the Barrishee is revealed - a small room with an Ancient Battle Axe sticking out of the mud and a loot chest which contains the Ring of Gathering, along with some other valuables.
Fifth Layer[]
The fifth layer is filled with Living Roots and Splodeshrooms, a dangerous fungus that explodes in a gas cloud, briefly inflicting Blindness and Decay on anyone caught in the gas. As before, there are also Broken Mud Tiles on the ground. Puffshrooms are the other new addition to this layer; mobs that emerge from the ground and will emit glowing spores, knocking the player's items out from their hands if they touch the cloud. Syrmorite Shears can be used to kill them and harvest Puffshroom Tendrils, an excellent food source.
Sixth Layer[]
The sixth layer is filled with Crypt Crawlers and Living Roots. In addition, the Carved Rotten Bark from the arches will sometimes fall, hurting the player and dealing extra damage to their helmet.
Crypt[]
In this layer, there is also an extra Dungeon Door that leads to the crypt tunnels and winding corridors. Unlocking it will cause numerous Crypt Crawlers to push it over and attack the player. Heading inside the player will have to travel through 2 block wide corridors with many slopes and levels, made mostly of Compacted Mud with some roots and other various plants dotting the sides. Many Crypt Crawlers will assault the player as they move through these tunnels.

sixth layer
Upon reaching the end of these tunnels, the player will find themselves in a slightly larger tunnel that loops around on itself, finding multiple entryways that the Crypt Crawlers had been spawning from. Each has a suspended Carved Rotten Bark above the entryways which will fall when the vine is destroyed, blocking them and preventing further spawns. Once the player gets to the end there will be a secret Crypt room with an Ancient Greatsword, as well as urns and vases to smash. There are also some false walls - one of which leads back to the entryway, and the other may lead to an armor stand with full Ancient Armor.
In addition, this is also one of two floors where vials of Bottled Fog can be collected for use in farming.
Seventh Layer[]
This layer is the last layer of the Labyrinthine Vaults. It contains only Moving Walls and Puffshrooms, no other features. Moving Walls are indestructible and cannot be blocked by any player-placed blocks or fallen Carved Rotten Bark. Should a player or any creature be crushed by one, it will deal immense damage, possibly lethal to all entities in general, before moving the other way. This can sometimes be irritating, as the Dungeon Door would usually have one in its path, crushing those who attempt to input a code. It is recommended one keeps the Rune Door Key on-hand for this door in particular, although it is possible one may not have enough time to put it in and expect to go through (the animation leaves the door solid until it eventually finishes).
This is one of two floors where Bottled Fog can be collected for use in farming.
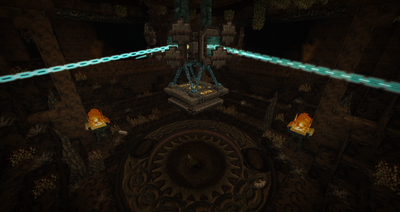
Pit of Decay[]
The Pit of Decay is the final room of the Sludgeon, and is also the room where the player can fight the Sludge Menace.
When they reach the bottom of the Sludgeon, the player will encounter a large mechanism suspended by chains, protected by flying shields, with a big, spinning gear shaped platform below it that will spin the player if stood on. In the middle of the gear is a big hole that continuously spawns Leech, Termites, Smoll Sludges, and Large Sludge Worms. On each side of the room are balconies, and below that, a wall made of Spike Traps. On each balcony there are two Sludge Jet Turrets that continuously respawn on either end, and lenses in the middle that shoot out a chain-shaped beam into the mechanism's lenses.
To fight the boss, the player needs to drop the mechanism into the gear pit, which can be done by firing arrows at lenses on the mechanism, between the moving shields. (Oddly enough, melee weapons (and simple fists) will also be considered as striking the lenses.)

The first phase of the fight. (before)
Once a lens is struck, the chain beam will disappear. When all four sides are done, the mechanism will lower itself, all beams reactivating. The platform will slowly rise again, rising up significantly if the player strikes one of its shields. The player must repeat this process continuously, faster than the mechanism can raise itself, to drop it into the pit. If a shield is hit, there is also a chance to spawn a "chain grabber" that will hold the player in place. The player can free themselves by rapidly pressing their attack button on it, or by shield charging with a Valonite Shield.

the second phase of the fight. (after)
Once the player has dropped the device five stages, the machine will fall onto the ground, plugging the pit and destroying the gears around it. After a short period of time, the ground will start to shake, and the Sludge Menace will rise from the depths of the ground as the final fight. (For more details and tips on the fight, see Sludge Menace)
Defeating the Sludge Menace will complete the dungeon and remove the block protection over the entire Sludgeon. This will also remove the Moving Walls and stop Sludgeon mobs from spawning.
Advancements[]
| Advancement | In-game Description | Parent | Actual Requirements | ID |
|---|---|---|---|---|
Light the Braziers |
Find a Sludgeon Tower | Dank World | Enter the main world location of a Sludgeon | adventurer /light_the_braziers |
A Real Poopy Experience |
Enter the Labyrinthine Vaults | Light The Braziers | Enter the world location of the Labyrinthine Vaults of the Sludgeon | adventurer /a_real_poopy_experience |
Sounds[]
| Sound | Subtitles | Source | Description | ID |
|---|---|---|---|---|
| Gears turn | Hostile Creatures | Plays constantly from the Pit of Decay | gears | |
| Sludge shoots out | Hostile Creatures | Plays when the Pit of Decay shoots up sludge | ppop_jet | |
| Beam activates | Hostile Creatures | Plays when a chain beam-linked lens on the Pit of Decay mechanism is hit | beam_activate | |
| Loud bashing | Hostile Creatures | Plays when the Pit of Decay mechanism lowers | plug_hit | |
| N/A | Hostile Creatures | Plays constantly when the Pit of Decay mechanism rises | chain_long | |
| Plug falls into place | Hostile Creatures | Plays when the Pit of Decay mechanism drops and plugs the pit | plug_lock | |
| Chain moves | N/A | Unused | chain |
Videos[]
 (13 KB)")
 (7 KB)")
 (24 KB)")
")
History[]
- Beta 3.5.0: Introduced.